Skip to content

Install "kept back" updates on Ubuntu

Linux

Canonical has implemented a staged roll-out for some Ubuntu package updates.

I find that rather annoying at times, e.g. when preparing the laptop for traveling.

So for my memory and for the benefit of others:

# disable the phased roll-out feature on this apt upgrade run
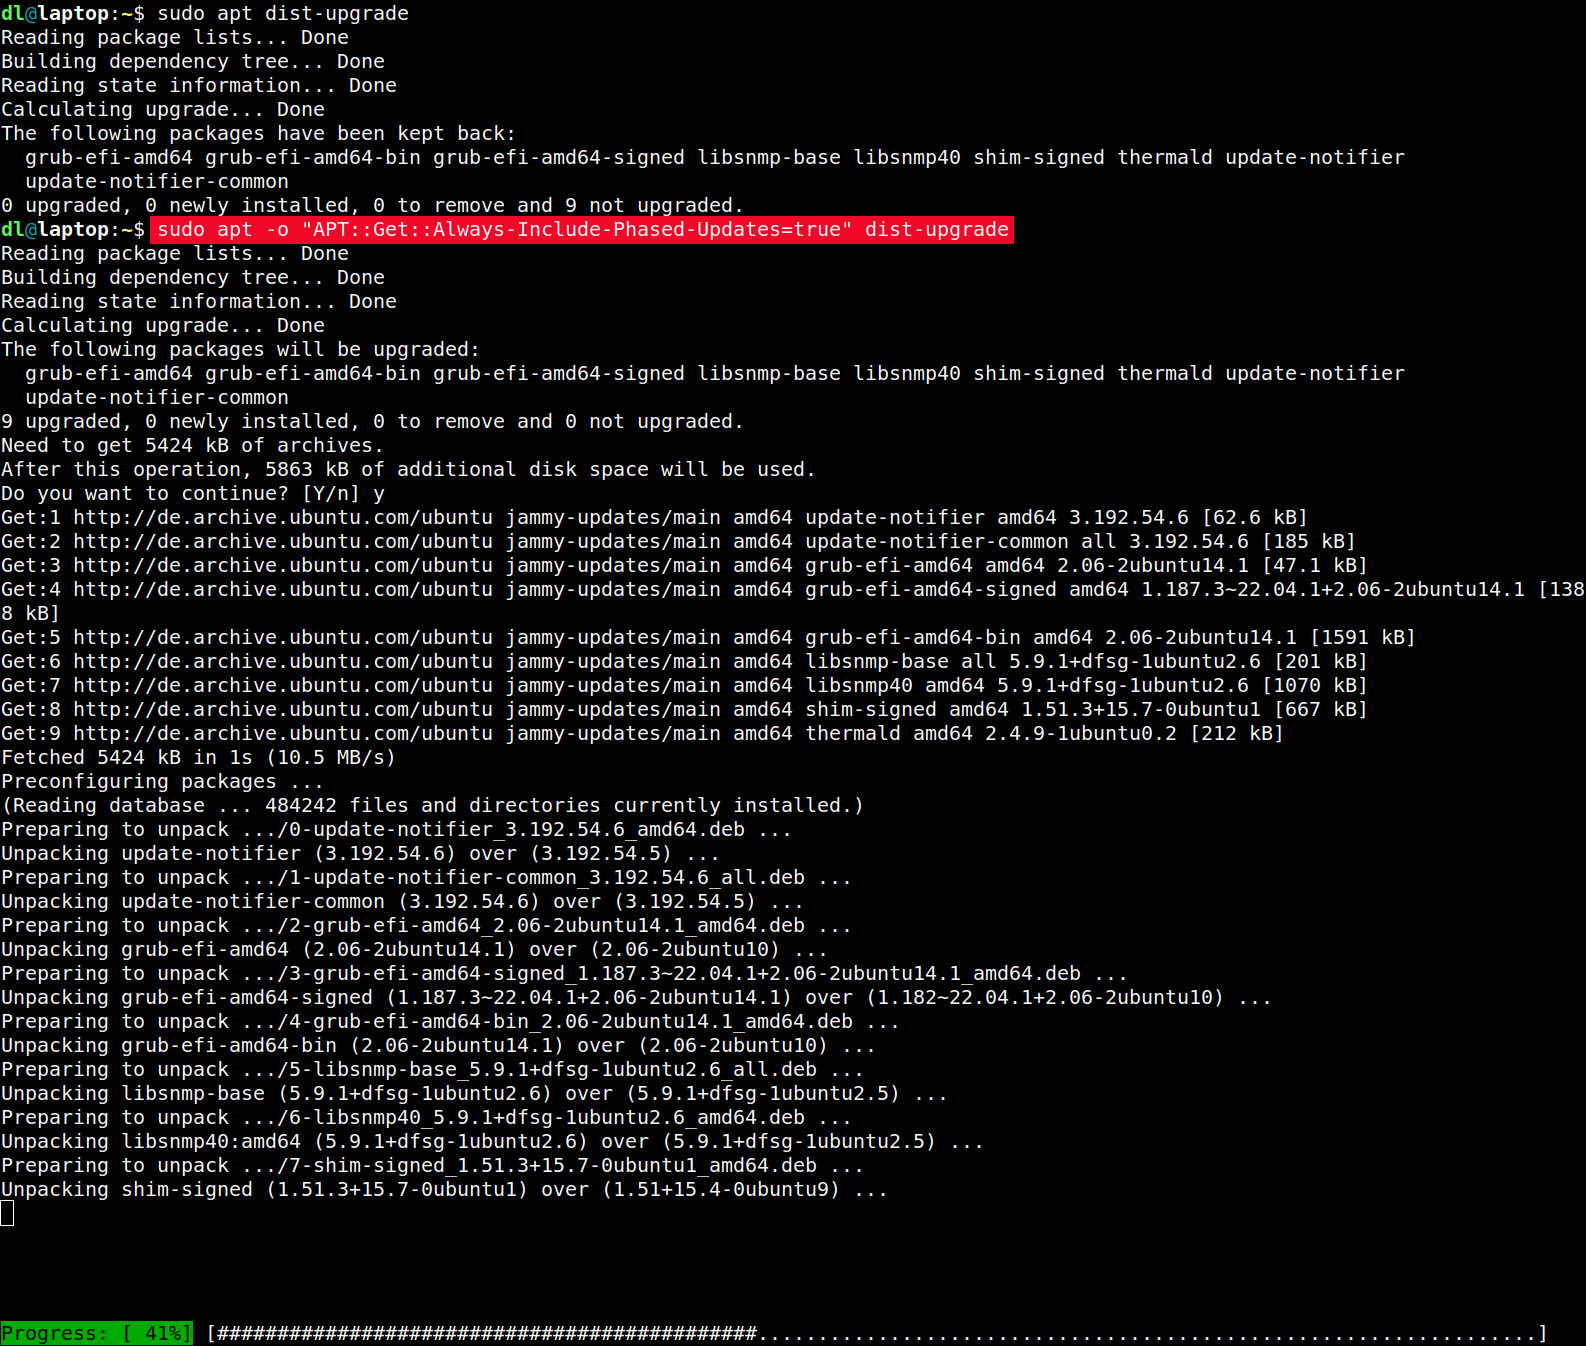
sudo apt -o "APT::Get::Always-Include-Phased-Updates=true" dist-upgrade

Screenshot of apt with the option to disable staged rollouts

This can - for permanent use - be put into a config file, e.g. Gerrit Heim puts it into /etc/apt/apt.conf.d/99-Phased-Updates [German]. Some other options around this staged roll-out feature are "documented" on a thread in the Ubuntu discourse forum.

Upgrading Limesurvey with (near) zero downtime

Open Source

Limesurvey is an online survey tool. It is very powerful and commonly used in academic environments because it is Free Software (GPLv2+), allows for local installations protecting the data of participants and allowing to comply with data protection regulations. This also means there are typically no load-balanced multi-server szenarios with HA databases. But simple VMs where Limesurvey runs and needs upgrading in place.

There's an LTS branch (currently 3.x) and a stable branch (currently 4.x). There's also a 2.06 LTS branch that is restricted to paying customers. The main developers behind Limesurvey offer many services from template design to custom development to support to hosting ("Cloud", "Limesurvey Pro"). Unfortunately they also charge for easy updates called "ComfortUpdate" (currently 39€ for three months) and the manual process is made a bit cumbersome to make the "ComfortUpdate" offer more attractive.

Due to Limesurvey being an old code base and UI elements not being clearly separated, most serious use cases will end up patching files and symlinking logos around template directories. That conflicts a bit with the opaque "ComfortUpdate" process where you push a button and then magic happens. Or you have downtime and a recovery case while surveys are running.

If you do not intend to use the "ComfortUpdate" offering, you can prevent Limesurvey from connecting to http://comfortupdate.limesurvey.org daily by adding the updatable stanza as in line 14 to limesurvey/application/config/config.php:

  1. return array(
  2.  [...]
  3.          // Use the following config variable to set modified optional settings copied from config-defaults.php
  4.         'config'=>array(
  5.         // debug: Set this to 1 if you are looking for errors. If you still get no errors after enabling this
  6.         // then please check your error-logs - either in your hosting provider admin panel or in some /logs directory
  7.         // on your webspace.
  8.         // LimeSurvey developers: Set this to 2 to additionally display STRICT PHP error messages and get full access to standard templates
  9.                 'debug'=>0,
  10.                 'debugsql'=>0, // Set this to 1 to enanble sql logging, only active when debug = 2
  11.                 // Mysql database engine (INNODB|MYISAM):
  12.                  'mysqlEngine' => 'MYISAM'
  13. ,               // Update default LimeSurvey config here
  14.                 'updatable' => false,
  15.         )
  16. );

The comma on line 13 is placed like that in the current default limesurvey config.php, don't let yourself get confused. Every item in a php array must end with a comma. It can be on the next line.

The basic principle of low risk, near-zero downtime, in-place upgrades is:

  1. Create a diff between the current release and the target release
  2. Inspect the diff
  3. Make backups of the application webroot
  4. Patch a copy of the application in-place
  5. (optional) stop the web server
  6. Make a backup of the production database
  7. Move the patched application to the production webroot
  8. (if 5) Start the webserver
  9. Upgrade the database (if needed)
  10. Check the application

So, in detail:

Continue reading "Upgrading Limesurvey with (near) zero downtime"

Tales from the Edge. #Security.

Fun

Late 2017, King county, Washington

An overworked team with an impossible mission, to create a secure Internet browser, on Windows, is called to the weekly time-waster product team meeting.

Product Manager:
Team, you know that Edge needs to be the most secure browser on the planet, right?
So how can this thing segfault if some dude from the security consultancy fuzzes the Backup.dat?

You MUST make sure this is protected. It MUST be a violation of Windows Policy to modify the file. Go, make it happen! Report back next week!

The team disperses.

Early next morning, at a set of tables in the middle of a dimly lit cube farm...

Developer:
Hey, team lead, do you know what the PM meant with "Windows Policy"? I never heard about a "Windows Policy". Is this the "Group Policy"? Or did he mean the product license? Like the shrink-wrap contract? Do we need to consult legal?

Team lead:
Oh, ffs, Bob. No time for discussion. The requirement is crystal clear. Implement it. You're the security lead. We have a deadline approaching.

Developer:
O.k., boss. I'll see what I can do.

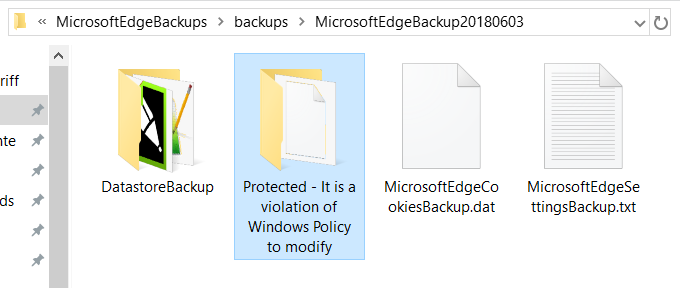
Windows Edge backup folder "Protected - It is a violation of Windows Policy to modify"

Continue reading "Tales from the Edge. #Security."

Updating the Dell XPS 13 9360 Thunderbolt firmware to get VGA and HDMI working

IT

Last year I bought the wonderful Dell XPS 13 9360 as it is certified to work with Ubuntu Linux and is just all around an awesome device. Dell made me buy the Windows version as only that got a 1 TB NVMe-SSD option. Linux apparently is only worthy of the 512GB and below models. What product manager comes up with such a stupid idea? Are SKUs that precious? Anyways ... so I bought a Windows version and that got wiped with a Linux install immediately as that was and is its intended purpose.

Dell DA200 USB-C to HDMI/VGA/Ethernet/USB 3.0 adapter

I purchased a DA200 with the system which is Dell's USB-C to anything (HDMI/VGA/Ethernet/USB 3.0) dongle. When I got the laptop the Ethernet port and USB 3.0 via the DA200 were working right out of the box. The VGA and HDMI ports were detected by Ubuntu but there was no way to get connected screens working. They stayed black.

The device was shipped with Thunderbolt firmware NVM18 and we've been told rather quickly by Dell this would be fixed with an update. And lo and behold Dell published the firmware version NVM21 right for Christmas 2016. Now unfortunately while their BIOS updates are Windows / DOS executables that can be just shoved at the Dell UEFI flash updater and thus the main BIOS can be updated from any OS, including Linux, without any hassle, the Intel provided Thunderbolt update needs Windows to get installed. Or, well, there is a convoluted way to compile an out-of-tree Linux kernel module, download and compile a few sets of software and do it via Linux. That description read so lengthy, I didn't even try it. Additionally there seems to have been no progress at all in getting this more mainline in the last three months, so I chose the cheap route and installed Windows 10 on a USB thumb drive1.

This is done via the (unfortunately Windows only) Win2USB software (the free version is sufficient).

Update: There's a new bash script windows2usb that looks good and should work to get you a bootable Windows USB thumb drive in Linux. WinUSB (that stopped working in the Win10 area some time) has also been forked and updated into WoeUSB. And there is WinToUSBLinux, yet another shell script. Give them a try.

Once Windows has rebooted often enough to finish its own installation, you can work with the USB thumb drive install as with any Windows 10. Nice.

Dell TPM 1.2 to 2.0 firmware update

Put all the files you downloaded from Dell to update your XPS 13 into a directory on the USB thumb drive. That way Windows does not need to have any network connectivity.

I first updated the TPM 1.2 firmware to a TPM 2.0 version (DellTpm2.0_Fw1.3.2.8_V1_64.exe at the time of writing this blog entry). Now this is quite hilarious as the Windows installer doesn't do anything but putting a UEFI firmware update into the EFI partition that runs on reboot. Duh. You do need to manually clear the TPM in the BIOS' security settings section (there's a clear checkbox) to be able to program new firmware onto it.
Thunderbolt firmware upgrade progress bar Thunderbolt firmware upgrade successful Now back in Windows install the Thunderbolt drivers (Chipset_Driver_J95RR_WN32_16.2.55.275_A01.exe at the time of writing this) and then run Intel_TBT3_FW_UPDATE_NVM21_0THFT_A00_3.21.00.008.exe, which is the NVM21 Thunderbolt firmware update (or a later version).

Reboot again (into Linux if you want to) and (drumroll) the VGA and HDMI ports are working. Awesome.

An update log can be found on the USB thumb drive at Dell\UpdatePackage\Log\Intel_TBT3_FW_UPDATE_NVM21_0THFT_A00_3.log:

*** Dell Thunderbolt firmware update started on 4/6/2017 at 12:56:56***
Command: C:\Install\Intel_TBT3_FW_UPDATE_NVM21_0THFT_A00_3.21.00.008.exe 

Starting FW Update....
***TBT GPIO Power is Turning On:  No Dock or DockInfo.
***TBT GPIO power is turned on.

Thunderbolt Firmware Update SUCCEEDED
TBT Items Registry creation is Success at \SOFTWARE\Dell\ManageableUpdatePackage\Thunderbolt Controller:
User selected OK for reboot
System TBT NVM Current Version:BCD:00000018: New Version:BCD:00000021

Exit Code = 0 (Success) 
***Thunderbolt Firmware flash finished at 4/6/2017 at 13:00:23***

If Windows has added its boot loader entry into your UEFI options, you can easily remove that again with the Dell UEFI BIOS or efibootmgr from within Linux.

The whole process took me less than 30 minutes. And most of that was creating the Windows USB thumb drive. I'll keep that for future updates until Intel and Dell have sorted out the Thunderbolt update process in Linux.

Updates:

18.05.17: Intel has published a large patchset on LKML to enable Thunderbolt security levels (thus preventing DMA attacks) and get NVM firmware upgrades mainlined. Yeah!

02.05.18: Added a link to the windows2usb bash script that should remove the need to create a bootable Windows USB thumb drive with a Windows only software.

11.06.18: Added a link to WoeUSB which is currently packaged for Ubuntu in a PPA.

08.04.20: Added a link to WinToUSBLinux. A recently released shell script to create a bootable Windows USB stick from Linux.

  1. If you go the Linux route please post a minimal image somewhere (kernel, initrd, squashfs or FAT16/32 raw image) and put a link into a comment below this blog post. Thanks. 

Irssi update to 0.8.19 from Debian jessie-backports may break enter / carriage return key / ↵ key

Debian

Updating to irssi 0.8.19 (which is a mainly a bugfix release to 0.8.18) proved a real issue. The enter key (return key) stopped working. Ctrl-J still worked but that's way too annoying to remember after each line. Searching the github issues turned up #327 Numeric keypad "Enter" key stopped working which didn't help much. Digging deeper it shows the irssi devs enabled "App key" mode in these releases which causes so many issues, they had to implement a switch to turn it off again.

So a hopeful: /set term_appkey_mode off followed by Ctrl+J, remember ...

and ... nothing changed.

So finally, after more digging and a quick consideration to go back to irssi 0.8.17 on Debian stable (Jessie) ...

/bind ^M key return

Yes, irssi 0.8.19 wants to be told what the enter key is, like, by default. Duh.
No idea what caused this in my configuration, I've been using irssi for more than a decade so much cruft has accumulated in my .irssi/config but ... in case you run into this as well, hopefully I helped you save a morning for something better to do.

If you want to fumble this into your .irssi/config (e.g. because Ctrl-J does not work for you):

keyboard = (
  [...]
  { key = "^M"; id = "key"; data = "return"; },
  [...]
);

Netatalk 3.1.8 .debs for Debian Jessie available (Apple Timemachine backup to Linux servers)

Debian

The Debian Netatalk3 saga continues at bug #685878. In season 4 of the epic the main issue still seems to be unclear license indications of a (very) few source files. And the usual "you go fix it", "no! you go fix it!". May be the fact that Firefox will be Firefox again in Debian [yeah!] could serve as an inspiration to the Netatalk maintainers?

Ah, well, until we have the eureka moment for Netatalk3 (4?) ...
<pragmatism style="priority-on-users:yes"> ... I'll post my .debs of the new 3.1.8 version of Netatalk as well.

Warning: Read the original blog post before installing for the first time. Be sure to read the original blog post if you are new to Netatalk3 on Debian Jessie!
You'll get nowhere if you install the .debs below and don't know about the upgrade path. So RTFA.

The release notes for 3.1.8 don't list anything that makes the update look mandatory but there is a nice compatibility fix for shares also exported via Samba (compatible xattrs handling). And it's faster.

The update instructions (assuming you have installed 3.1.7 before) are:

# install new debs
dpkg -i libatalk17_3.1.8-1_amd64.deb netatalk_3.1.8-1_amd64.deb
# reboot the box (restart of netatalk may not be sufficient)
reboot
# After reboot: remove the obsolete libatalk16 (3.1.8 uses libatalk17)
dpkg -r libatalk16

And here are the files:

Continue reading "Netatalk 3.1.8 .debs for Debian Jessie available (Apple Timemachine backup to Linux servers)"

Cygwin automatic updates

IT

Cygwin is a fantastic product for people that need to use Microsoft Windows and require some compatibility to Linux (or BSD or UNIX in general).

Unfortunately it is not trivial to keep it updated (and thus safe) as the update process requires downloading the latest installer and then clicking through the package list again and again on every update.
No apt-get update, no emerge --update @world, no dnf update.

But ... the people at Red Hat (who now own Cygwin) are not mean, they are just not good at documenting things :-)...

Be sure to have wget installed via cygwin, you'll need it to fetch the installer automatically.
Then drop the following batch file as cyg_update.bat into C:\cygwin64 (or where you have installed cygwin1):

  1. @echo off
  2. cd /d C:\cygwin64
  3. del /Q cygwinSetup-x86_64.exe
  4. bin\wget.exe --progress=dot -S -N http://cygwin.com/setup-x86_64.exe
  5. move /y setup-x86_64.exe cygwinSetup-x86_64.exe
  6. REM S-1-1-0 is the SID for "Everyone"
  7. icacls cygwinSetup-x86_64.exe /grant *S-1-1-0:RX
  8. cygwinSetup-x86_64.exe --no-desktop --no-shortcuts --no-startmenu --quiet-mode

Once you start the batch (e.g. by double-clicking from Windows Explorer) it will download the latest installer from Cygwin.com and perform a silent update. You need to approve the Windows installer warning as you do with every manual install / update as well. So it's not a no-click update but a one-or-two-clicks update.
Still much better than the click fest without the batch file.

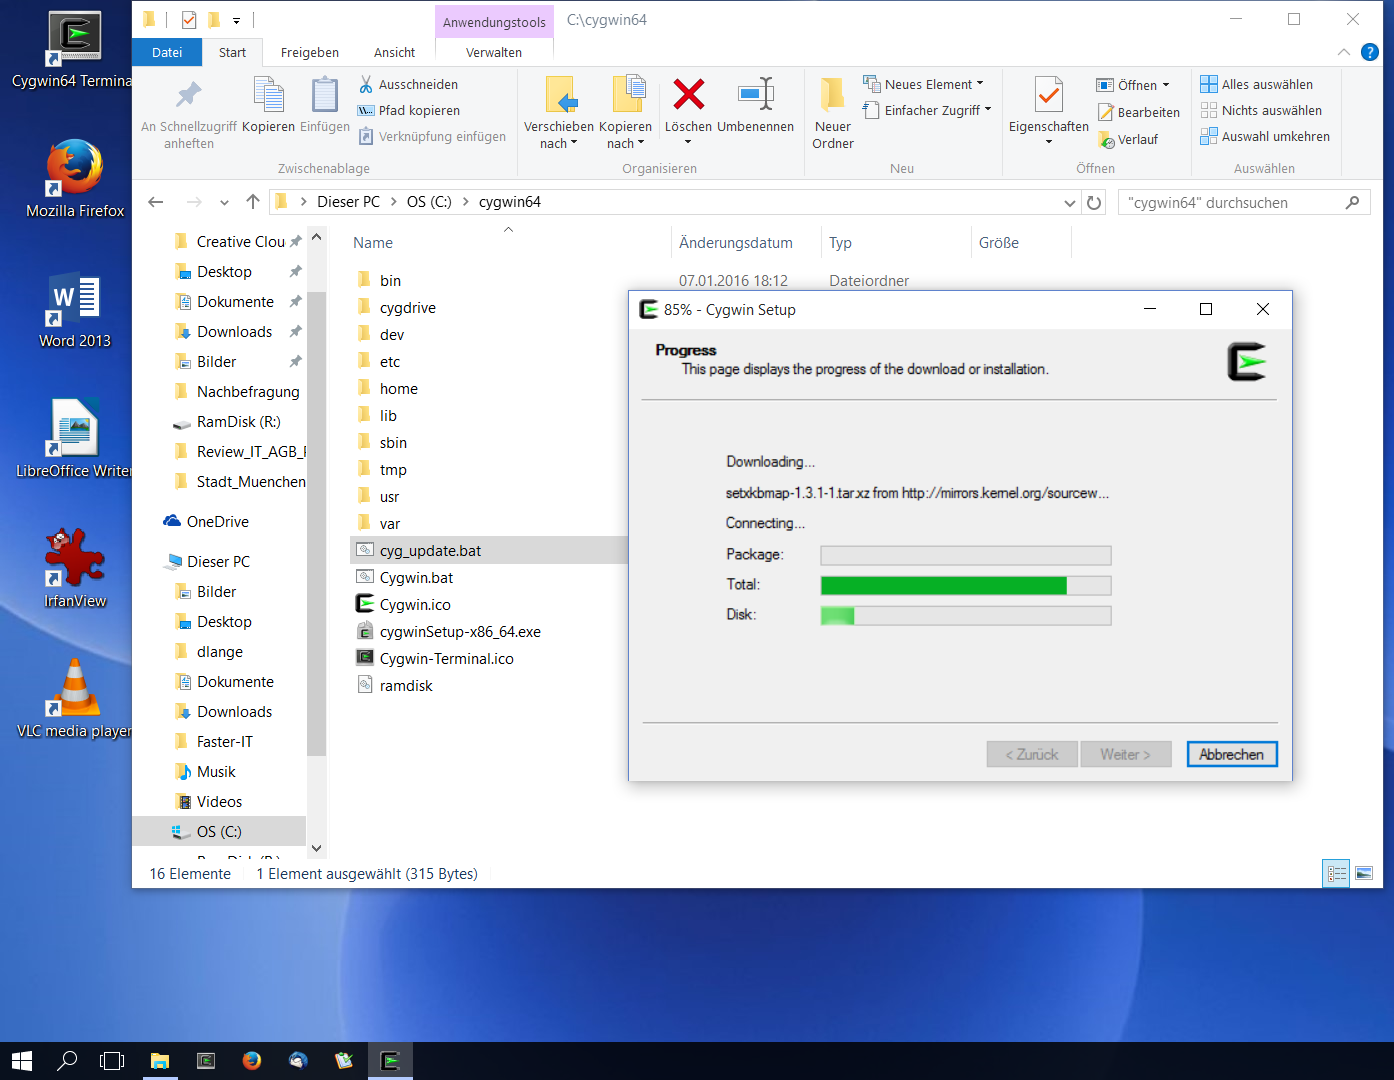
Cygwin update screenshot

Update

01.06.2017: I've changed icacls cygwinSetup-x86_64.exe /grant Everyone:RX to icacls cygwinSetup-x86_64.exe /grant *S-1-1-0:RX which is the SID and not language dependent. 'cause otherwise German Windows would like to see "Jeder" and French "Tous publics", Chinese "任何人", etc. Looking them up on Microsoft's terminology search is quite nice but not really scalable.


  1. If you have installed the 32bit version and/or used a different install path, adjust line 2 of the batch file accordingly. Did I need to say that? Hm, well, I did ... have a cookie.